This works for virtually any version. I'm using CS for this image, however.

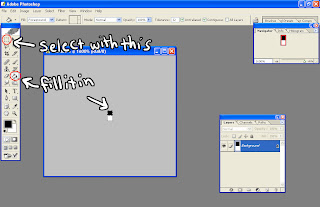
So make a new document that's 1x2. Basically, follow the settings I have there.

Then you're gonna press Control + 0 (the number zero) to zoom it in to the max setting. Grab the selection tool and select half the image. Use the paint bucket tool to fill it in white.

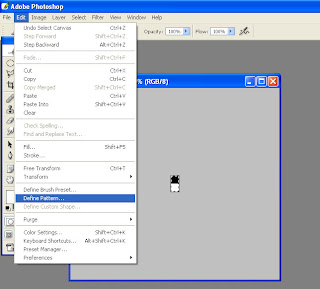
Once you're done, press Control + A and go to the Edit menu and click "Define Pattern". It will prompt you to name the pattern. Feel free to name it "Scanline" or "Glockenspiel" or whatever floats your boat. You can close this image and not save it, since photoshop has now saved this as a pattern.

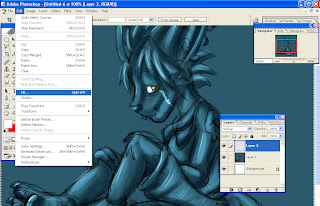
I needed a test image, so I grabbed this one off my furaffinity page. So once you got the image desired, make a new layer on top of it and then press Control + A (for select all). Then go to your edit menu again and select fill. It will show you a list of patterns. Pick your scanline pattern (it should be the last one) and press okay.

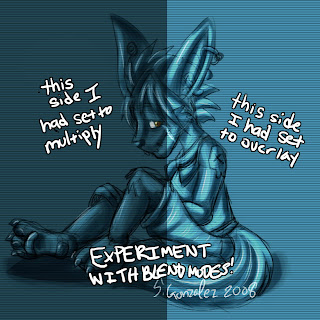
This is my end result. Adter filling in the selection, you need to go to the blending options toolbar in your layers toolbar and mess around with the blending options. As you can tell, I used two different blend modes on seperate layers. Photoshop has several blending modes, don't be shy to try them all.
Thanks for reading!


No comments:
Post a Comment